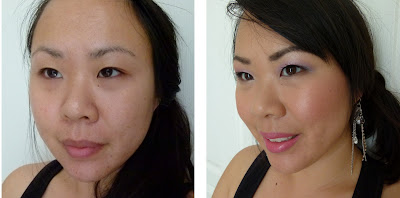
My finished sakura-themed look.
I am thrilled about today's post.
Anna of Fenua Beauté and I were gushing about our love for
Sugarpill cosmetics and had previously discussed how we are weak in the knees for any makeup product with incoperating the theme of sakura. So, we decided over
Twitter to collaborate to do a sakura-themed FOTD on our respective blogs using our favorite Sugarpill products.
In Anna's look, she paints delicate petals on the corners of her eyes.
Click here to see her look. She looks ethereal!
I wanted to paint the actual blossoms on my face and extend the shadow to the hairline. I think it would be awesome to bring this look to the next level and make it uber kawaii and outrageous. But I wanted it to be somewhat wearable for most folks. You can make this look more subtle by not taking the shadow out as far and limited the blossoms to one (or none).
See the step-by-step for details. Above are Tiara (silver), Lumi (white) and Paperdoll (purple) loose eyeshadows. The palette is 4-Color Palette in
Sweetheart. I used Dollipop and Tako pressed eyeshadows. All products are available at
sugarpillshop.com. If you want to see a review of them, click here for the
Sweetheart palette and here for
ChromaLust Loose Eyeshadows.
Step 1: After you have put on your face makeup, prime your eye area (lid, undereye and to the temple) with an eyeshadow primer. I used Nars Smudge Proof Eyeshadow Primer.
Step 2: To create a base, I mixed Inglot Duraline with
Lumi ChromaLust Loose Eyeshadow. Lumi is an irisdescent white with blue and green shimmer. It is very sheer and makes a nice base for the eyelid.
Step 2 (cont'd): Cover the entire lid to the brow with this base. Also apply to the lower lash line. This will help hold color.
Step 3: Apply Dollipop at the crease. Blend upwards. Pack on extra color at the center of the eye for a pop of pink.
Step 3 (cont'd): Blend upwards and to the start of the eyebrow, creating a sort of Y shape. Don't worry if this looks weird now. You'll blend and mix later to soften edges and bring the look together.
Step 4: Where Dollipop ends, take Paperdoll and blend to soften the line. Extend outwards towards the temple.
Step 4 (cont'd): Blend outwards towards to temple.
Step 4 (cont'd): Keep going.... all the way to the hairline.
Step 5: Take a larger blending brush and dip in Dollipop. From the hairline in circular motions create soft clouds of color towards the eye.
Step 6: With the same brush, dip in Tako and blend towards the eye. Don't be afraid to go above the eyebrows or onto the tops of the cheekbone.
Step 7: Take Tiara on a clean brush and highlight the eyebrow and the inner corners of the eye, near the tear duct. Using the same brush, apply Tako to the inner corners of the eye.
Step 8: Blend Tiara to the eyeshadow in the temple. Blend to make everything cohesive, but don't over-blend to muddle the colors.
Step 10: Line the bottom waterline with a white pencil. I'm using Maybelline Unstoppable Eyeliner in Fluffy Cloud, a limited edition shade for Spring 2011.
Step 11: Apply top lashes.
Step 12: Apply bottom lashes for an extra doll-like look. Define your brows.
Step 13: The fun part! Painting the blossoms. I'm using creme colors from Make Up For Ever's 12 Flash Color Case. I mixed the white and fuchsia shades together to create the petals.
Step 13 (cont'd): Obviously, I'm not going for perfection here! The petals can be more blobs, and then go in with another color to define.
Step 13 (cont'd): The smaller the brush the better.
Pretty petals!
Sakura! Spring is here!
Right eye (blossoms here are dotted with yellow and silver).
Go large or small on the petals. No reason to just stop at 3. Go above the eyebrow or onto the cheeks!
Thanks
Anna for collaborating with me on this super fun project! I had a great time doing it, and I hope it's one of many!
Do you like cherry blossoms? Do go anywhere to see them?


